Lua Web 开发 - 利用Nginx的rewrite完成伪静态
前言
撰写本文的初衷是因为有一些同学私下咨询过:关于动态链接如何的静态化的疑问.
秉着分享的态度撰写了本文后, 希望大家能对Web开发有更深入的了解:
-
本文将给大家介绍将动态链接地址转换为
伪静态页面的做法. -
本文仅针对不支持
rest软件架构风格的web开发框架提出页面静态化的解决方案. -
本文并不会对一些安装、开发细节提供描述, 这些细节需要大家自行学习与领悟.
-
本文所述方法已经在业界已使用多年, 但并不意味着技术变迁与必要性. 只是侧面说明特殊业务场景并能提供不同的解决方案.
一、 测试环境
| 名字 | 内容 |
|---|---|
| 环境 | MAC OSX 10.15.3 |
| 版本 | nginx/1.18.0 |
| 编译器 | Apple clang version 11.0.0 (clang-1100.0.33.8) |
二、 安装 Nginx
截止到目前为止(2020年5月9日), Nginx发布的最新版本为: 1.18.
我们可以在这个页面下载Nginx, 并解压到合适的目录完成编译与安装.
安装完成后, 我们在安装的目录下面的conf可以找到nginx.conf配置文件!
我们在倒数第二行增加了配置扩展目录, 这是为了区分nginx配置与vhost配置.
  worker_processes  1;

  events {
    worker_connections  1024;
  }


  http {
    include       mime.types;
    default_type  application/octet-stream;

    log_format  main  '$remote_addr - $remote_user [$time_local] "$request" '
                        '$status $body_bytes_sent "$http_referer" '
                        '"$http_user_agent" "$http_x_forwarded_for"';

    sendfile        on;

    keepalive_timeout  65;

    gzip  on;

    include conf.d/*.conf;
  }
现在我们在nginx安装目录下的conf目录内, 增加conf.d目录并在里面增加一个vhost.conf配置文件, 内容如下:
  server {
    listen       80;
    server_name  localhost;

    access_log  logs/cfadmin.access.log  main;
    error_log   logs/cfadmin.access.log  error;

    location / {
      root html;
      index index.html;
    }
  }
在命令行输入: nginx -t, 如果输出结果如下, 则表示配置完成;
[candy@MacBookPro:~/Documents/nginx] $ sbin/nginx -t
nginx: the configuration file /Users/candy/Documents/nginx/conf/nginx.conf syntax is ok
nginx: configuration file /Users/candy/Documents/nginx/conf/nginx.conf test is successful
[candy@MacBookPro:~/Documents/nginx] $
三、编写一个简单的路由
cf框架的入口文件main.lua修改为如下所示:
local httpd = require "httpd"

local app = httpd:new("App")

app:use("/articles", function (content)
	content.args = type(content.args) == 'table' and content.args or {}
	return string.format([[
		<html>
		<head>
		  <title>%s</title>
		</head>
			<h1>文章ID为: %d</h1>
			<h2>用户ID为: %d</h2>
		</html>
		]],
		content.args['title'] or "未找到title",
		content.args['aid'] or "无",
		content.args['uid'] or "无"
	)
end)

app:listen("0.0.0.0", 8080)

app:run()
修改完成之后在命令行运行它.
[candy@MacBookPro:~/Documents/core_framework] $ ./cfadmin
[2020/05/9 20:36:13] [INFO] httpd listen: 0.0.0.0:8080
[2020/05/9 20:36:13] [INFO] httpd Web Server Running...
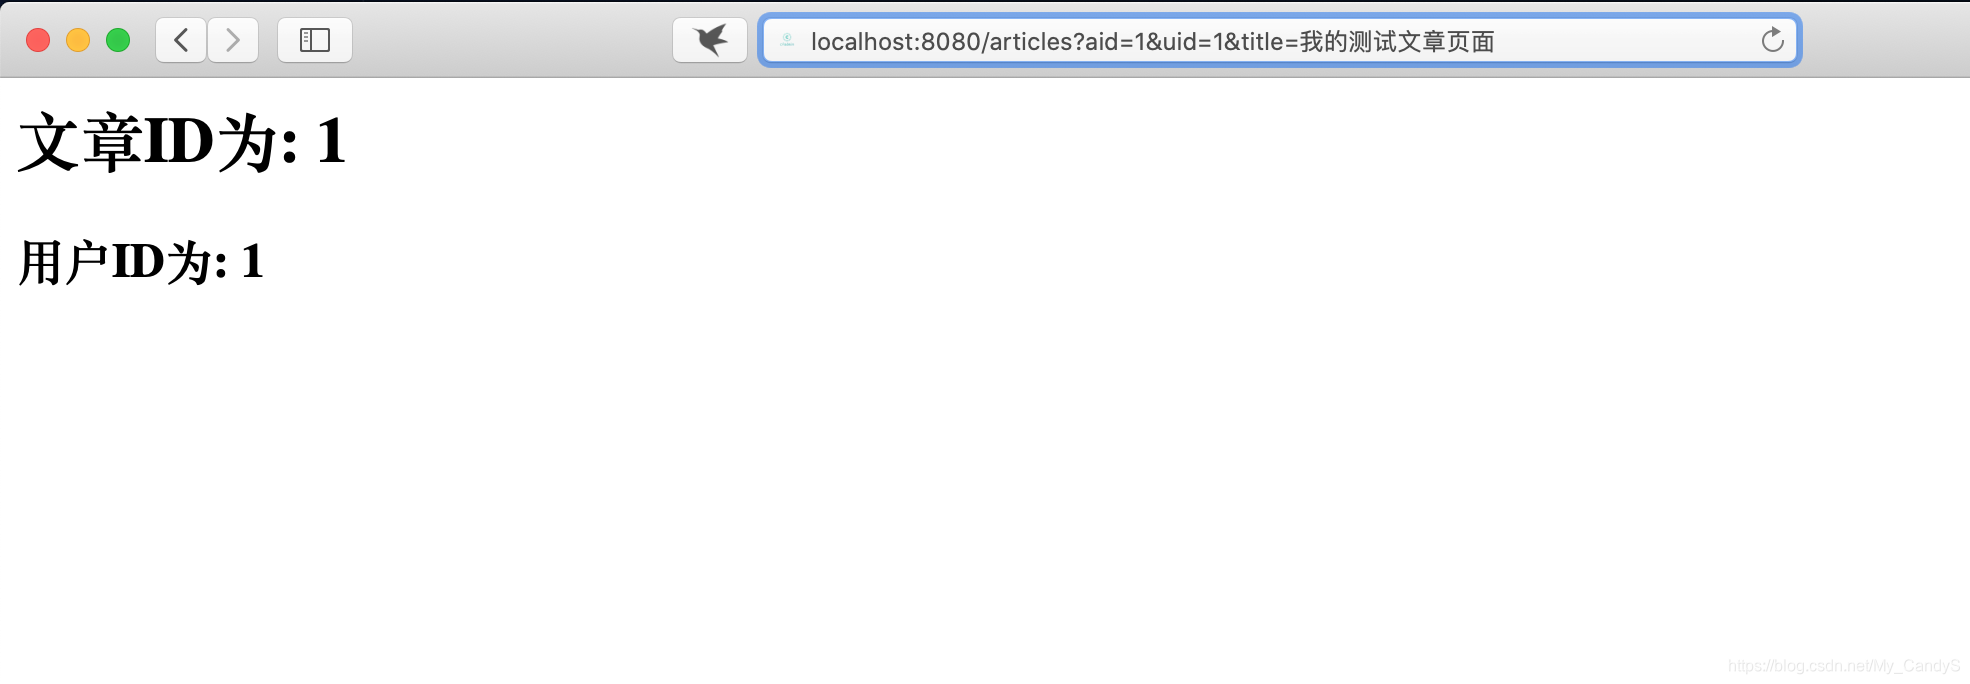
成功执行! 现在, 我们打开页面测试一下!


经过2次测试, 说明页面的路由配置已经完成. 现在我们尝试将其修改为伪静态!
四、 Nginx的rewrite规则
原路由:/articles?aid=100&uid=1000&title=测试页面
修改后的路由: /articles/100-1000-我的测试页面.html
首先, 我们打开之前配置的conf.d/vhost.conf 添加一条如下规则:
rewrite ^/articles/([\d]+)-([\d]+)-(.+).html /articles?aid=$1&uid=$2&title=$3 break;
然后将之前的location规则修改成这样:
  location / {
    proxy_pass http://localhost:8080;
    proxy_http_version 1.1;
    proxy_ignore_client_abort on;
    proxy_set_header Host $http_host;
    proxy_set_header X-Real-IP $remote_addr;
    proxy_set_header Connection "";
    proxy_set_header X-Forwarded-For $proxy_add_x_forwarded_for;
  }
完整的vhost.conf应该是这样的:
server {
  listen       80;
  server_name  localhost;

  access_log  logs/cfadmin.access.log  main;
  error_log   logs/cfadmin.access.log  error;

  rewrite ^/articles/([\d]+)-([\d]+)-(.+).html /articles?aid=$1&uid=$2&title=$3 break;

  # rewrite ^/articles/([\d]+)-([\d]+)-(.+).html /articles?aid=$1&uid=$2&title=$3 redirect;

  # rewrite ^/articles/([\d]+)-([\d]+)-(.+).html /articles?aid=$1&uid=$2&title=$3 permanent;

  location / {
    proxy_pass http://localhost:8080;
    proxy_http_version 1.1;
    proxy_ignore_client_abort on;
    proxy_set_header Host $http_host;
    proxy_set_header X-Real-IP $remote_addr;
    proxy_set_header Connection "";
    proxy_set_header X-Forwarded-For $proxy_add_x_forwarded_for;
  }
}
我们在这里简单讲述一下这一条rewrite命令的含义:
| 命令 | 语法 |
|---|---|
| rewrite | rewrite regex replacement [flag]; |
| 默认值 | none |
| 位置 | server、location、if |
rewrite 命令主要用【regex】的正则表达式来对URL进行匹配/提取, 然后将请求转换为【replacement】的样式发送到后端代理的服务器.
其中flag有以下这些常见的可选参数:
break表示本条规则匹配完成后终止,不在匹配任何规则;redirect使用http 302 code的方式跳转到replacement路由上;permanent使用http 301 code的方式跳转到replacement路由上;
至此, 就完成了基本的伪静态操作!
五、 测试
1. break flag
现在, 让我们使用curl命令来测试请求.
值得一提的是: curl命令的-i与-v参数表示详细打印交互流程与输出结果到终端(stdout).
[candy@MacBookPro:~] $ curl http://localhost/articles/100-1000-测试页面.html -i -v
*   Trying ::1...
* TCP_NODELAY set
* Connection failed
* connect to ::1 port 80 failed: Connection refused
*   Trying 127.0.0.1...
* TCP_NODELAY set
* Connected to localhost (127.0.0.1) port 80 (#0)
> GET /articles/100-1000-测试页面.html HTTP/1.1
> Host: localhost
> User-Agent: curl/7.64.1
> Accept: */*
>
< HTTP/1.1 200 OK
HTTP/1.1 200 OK
< Server: nginx/1.18.0
Server: nginx/1.18.0
< Content-Type: text/html; charset=utf-8
Content-Type: text/html; charset=utf-8
< Content-Length: 123
Content-Length: 123
< Connection: keep-alive
Connection: keep-alive
< Accept-Ranges: none
Accept-Ranges: none
< Origin: *
Origin: *
< Allow: GET, POST, PUT, HEAD, OPTIONS
Allow: GET, POST, PUT, HEAD, OPTIONS
< Cache-Control: no-cache, no-store, must-revalidate
Cache-Control: no-cache, no-store, must-revalidate

<
	<html>
	<head>
	  <title>测试页面</title>
	</head>
		<h1>文章ID为: 100</h1>
		<h2>用户ID为: 1000</h2>
	</html>
* Connection #0 to host localhost left intact
* Closing connection 0
[candy@MacBookPro:~] $
我们可以看到伪静态已经配置成功. 现在我们看下cf框架里的日志输出:
[candy@MacBookPro:~/Documents/core_framework] $ ./cfadmin
[2020/05/9 20:36:13] [INFO] httpd listen: 0.0.0.0:8080
[2020/05/9 20:36:13] [INFO] httpd Web Server Running...
[2020/05/9 20:40:24] - 127.0.0.1 - 127.0.0.1 - /articles?aid=100&uid=1000&title=测试页面 - GET - 200 - req_time: 0.000065/Sec
我们从输出结果中可以看到, 修改后的路由也正确的被识别到了!
可能有一些细心的同学发现了, 我们还有2个被注释掉的301与302的规则.
现在我们来看看把flag改为redirect或permanent与break之间的输出差异吧!
2. redirect flag
首先是redirect, 我们将break与permanent注释, 重启Nginx后再次发送请求:
server {
  listen       80;
  server_name  localhost;

  access_log  logs/cfadmin.access.log  main;
  error_log   logs/cfadmin.access.log  error;

  # rewrite ^/articles/([\d]+)-([\d]+)-(.+).html /articles?aid=$1&uid=$2&title=$3 break;

  rewrite ^/articles/([\d]+)-([\d]+)-(.+).html /articles?aid=$1&uid=$2&title=$3 redirect;

  # rewrite ^/articles/([\d]+)-([\d]+)-(.+).html /articles?aid=$1&uid=$2&title=$3 permanent;

  location / {
    proxy_pass http://localhost:8080;
    proxy_http_version 1.1;
    proxy_ignore_client_abort on;
    proxy_set_header Host $http_host;
    proxy_set_header X-Real-IP $remote_addr;
    proxy_set_header Connection "";
    proxy_set_header X-Forwarded-For $proxy_add_x_forwarded_for;
  }
}
执行curl命令查看输出结果:
[candy@MacBookPro:~] $ curl http://localhost/articles/100-1000-测试页面.html -i -v
*   Trying ::1...
* TCP_NODELAY set
* Connection failed
* connect to ::1 port 80 failed: Connection refused
*   Trying 127.0.0.1...
* TCP_NODELAY set
* Connected to localhost (127.0.0.1) port 80 (#0)
> GET /articles/100-1000-测试页面.html HTTP/1.1
> Host: localhost
> User-Agent: curl/7.64.1
> Accept: */*
>
< HTTP/1.1 302 Moved Temporarily
HTTP/1.1 302 Moved Temporarily
< Server: nginx/1.18.0
Server: nginx/1.18.0
< Content-Type: text/html
Content-Type: text/html
< Content-Length: 145
Content-Length: 145
< Location: http://localhost/articles?aid=100&uid=1000&title=测试页面
Location: http://localhost/articles?aid=100&uid=1000&title=测试页面
< Connection: keep-alive
Connection: keep-alive

<
<html>
<head><title>302 Found</title></head>
<body>
<center><h1>302 Found</h1></center>
<hr><center>nginx/1.18.0</center>
</body>
</html>
* Connection #0 to host localhost left intact
* Closing connection 0
[candy@MacBookPro:~] $
3. permanent flag
最后就是permanent, 我们将break与redirect注释, 重启Nginx后再次发送请求:
server {
  listen       80;
  server_name  localhost;

  access_log  logs/cfadmin.access.log  main;
  error_log   logs/cfadmin.access.log  error;

  # rewrite ^/articles/([\d]+)-([\d]+)-(.+).html /articles?aid=$1&uid=$2&title=$3 break;

  # rewrite ^/articles/([\d]+)-([\d]+)-(.+).html /articles?aid=$1&uid=$2&title=$3 redirect;

  rewrite ^/articles/([\d]+)-([\d]+)-(.+).html /articles?aid=$1&uid=$2&title=$3 permanent;

  location / {
    proxy_pass http://localhost:8080;
    proxy_http_version 1.1;
    proxy_ignore_client_abort on;
    proxy_set_header Host $http_host;
    proxy_set_header X-Real-IP $remote_addr;
    proxy_set_header Connection "";
    proxy_set_header X-Forwarded-For $proxy_add_x_forwarded_for;
  }
}
执行curl命令查看输出结果:
[candy@MacBookPro:~] $ curl http://localhost/articles/100-1000-测试页面.html -i -v
*   Trying ::1...
* TCP_NODELAY set
* Connection failed
* connect to ::1 port 80 failed: Connection refused
*   Trying 127.0.0.1...
* TCP_NODELAY set
* Connected to localhost (127.0.0.1) port 80 (#0)
> GET /articles/100-1000-测试页面.html HTTP/1.1
> Host: localhost
> User-Agent: curl/7.64.1
> Accept: */*
>
< HTTP/1.1 301 Moved Permanently
HTTP/1.1 301 Moved Permanently
< Server: nginx/1.18.0
Server: nginx/1.18.0
< Content-Type: text/html
Content-Type: text/html
< Content-Length: 169
Content-Length: 169
< Location: http://localhost/articles?aid=100&uid=1000&title=测试页面
Location: http://localhost/articles?aid=100&uid=1000&title=测试页面
< Connection: keep-alive
Connection: keep-alive

<
<html>
<head><title>301 Moved Permanently</title></head>
<body>
<center><h1>301 Moved Permanently</h1></center>
<hr><center>nginx/1.18.0</center>
</body>
</html>
* Connection #0 to host localhost left intact
* Closing connection 0
[candy@MacBookPro:~] $
4. 结论
-
break会将用户请求修改后直接发送到后端服务器, 同时得到结果后原样返回给客户端. -
redirect/permanent则会根据匹配的规则, 返回301/302重定向引导客户端再次发起访问.
break显然就是我们需要实现的页面静态化方案, redirect/permanent更常用于地址转移后优雅的解决访问失败的情况.
至此为止, 本文所讲述的Nginx利用rewrite命令实现伪静态的功能已经完成.